How to Grow Norway Maple Trees from Seeds Easily
Growing a Norway maple from seed can be a rewarding project, offering a chance to cultivate your shade tree. While these trees are known for their hardiness and adaptability, starting from a Norway maple seed requires a bit of patience and specific preparation. This guide will walk you through the process, from collecting the seeds in the fall to caring for your new seedlings.
Key Takeaways
- Norway maple seeds, called samaras, are collected in the fall and have a low germination rate, so gather more than you think you’ll need.
- Cold stratification is necessary for Norway maple seed germination, mimicking natural winter conditions.
- You can stratify seeds at home by storing them in a moist medium in the refrigerator for 90-120 days.
- Sow seeds at a depth of about a quarter-inch in a well-draining medium, spacing them densely due to the low germination rate.
- Provide consistent moisture, appropriate light, and eventually transplant seedlings to a suitable location with ample space.
What Is a Norway Maple (Acer platanoides)? Overview and Key Features
The Norway maple, scientifically known as Acer platanoides, is a popular deciduous tree that originates from Europe and western Asia. It’s widely recognized for its attractive form and adaptability, making it a common sight in many landscapes. This tree is known for its dense, rounded crown and its ability to tolerate a variety of conditions, including pollution and different soil types. Introduced to North America in the mid-18th century, it quickly gained favor as a shade tree.
Key Characteristics
Norway maples are medium to large trees, typically reaching heights of 50 to 60 feet, though they can grow taller under ideal conditions. They have a vigorous growth rate and a lifespan that can extend for many decades. The bark on younger trees is smooth and gray, becoming darker, furrowed, and more textured as the tree matures.
Foliage and Seasonal Interest
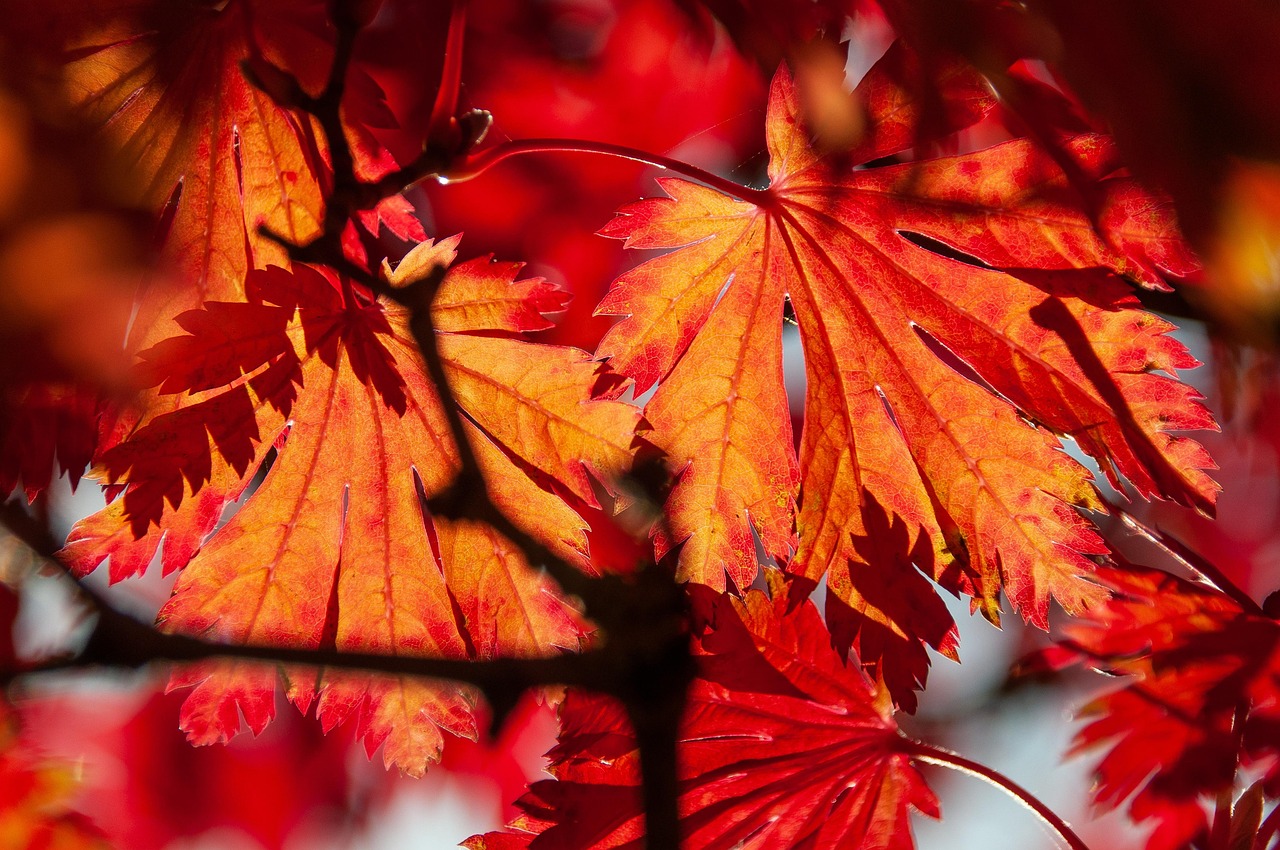
The leaves are large, typically 5-lobed, and are a glossy dark green throughout the growing season. In the fall, the foliage transforms into a vibrant yellow, offering a beautiful display before leaf drop. Some cultivars, like ‘Crimson King’, are specifically grown for their distinctive deep red foliage, which persists through the summer and turns to a bronze-red in autumn.
Adaptability and Growing Conditions
This species is hardy in USDA zones 4 through 7. It performs well in full sun to partial shade and can adapt to a range of soil conditions, including clay, sand, and slightly acidic soils, as long as they are reasonably well-drained. While it has some drought tolerance once established, consistent moisture is preferred for optimal growth. Its resilience makes it a good choice for urban environments.
While the Norway maple is admired for its ornamental qualities and hardiness, it’s important to be aware of its potential to naturalize and spread aggressively in certain regions. Careful consideration of local planting regulations and potential ecological impact is advised.
Root System
One aspect to note about Norway maples is their root system. They tend to develop a dense network of surface roots, which can sometimes become a landscaping challenge, potentially interfering with sidewalks or lawns. Proper planning during planting can help mitigate this issue. You can find more information on tree characteristics.
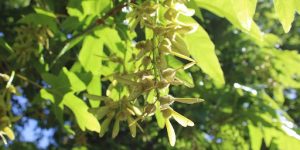
Seed Production
Norway maples produce winged seeds called samaras. These seeds are typically released in the fall and can be dispersed by wind, leading to the germination of new seedlings. Managing seed production can be a consideration for gardeners aiming to control the spread of this species.
When and How to Collect Norway Maple Seeds in Fall
Collecting seeds from Norway Maple trees (Acer platanoides) is a straightforward process, but timing is key. These trees typically release their seeds, known as samaras or ‘helicopters,’ in the autumn months. The ideal window for collection is generally September through October. You’ll want to look for the samaras that have begun to change color, often turning from green to a tan or light brown hue, and appear somewhat dry or crinkly. They might still be attached to the tree, or they may have already fallen to the ground. If you’re collecting from the ground, try to gather them before they become too weathered or are eaten by wildlife.
When you find the samaras, you can either pluck them directly from the branches or collect them after they’ve dropped. It’s a good idea to gather more seeds than you think you’ll need, as Norway Maple seeds often have a lower germination rate. A good strategy is to collect a substantial amount, perhaps a few handfuls, to increase your chances of success when you learn how to grow Norway Maple from seed.
- Observe the tree: Look for samaras that are mature and starting to detach.
- Check the color: Mature seeds will have a tan or light brown color.
- Gather generously: Collect more than you anticipate needing due to variable germination rates.
- Timing is important: Aim for late September or October for the best results.
It’s important to correctly identify the tree species before collecting seeds. While Norway Maples are common, ensuring you’re collecting from the right tree will prevent disappointment later on. Familiarize yourself with the distinctive features of Norway Maples to be certain.
Once you have collected samaras, you’ll need to prepare them for the next step, which involves stratification. You can find more information on identifying maple trees and their seeds on our website.
Why Cold Stratification Is Essential for Norway Maple Seeds
Norway maple seeds, like many tree seeds, have a natural defense mechanism built in to prevent them from sprouting too early. Think of it like a built-in timer. This dormancy is what makes cold stratification so important. Without this cold period, the seeds simply won’t know it’s the right time to grow, even if you give them perfect warmth and water.
Mimicking Nature’s Cycle
Cold stratification essentially mimics the natural process these seeds go through in the wild. After falling from the tree in autumn, they’re exposed to the cold temperatures of winter. This prolonged chill signals to the seed that spring is coming, and it’s time to break dormancy and start growing. By replicating this winter-like period indoors, we’re tricking the seeds into thinking they’ve survived a winter and are ready to sprout.
Breaking Dormancy
The cold treatment helps to soften the seed coat and activate the enzymes within the seed that are necessary for germination. This process is quite specific for Norway maples. Skipping it means you’re likely to have very few, if any, seeds sprout. It’s a bit like trying to start a car without putting gas in it – the engine might turn over, but it won’t go anywhere.
Why It’s Not Optional
While some maple varieties might germinate without stratification, Norway maples generally require it for successful germination. Trying to sow them immediately after collection without this cold period is a common reason why people get frustrated with low germination rates. It’s a necessary step to get those little trees going.
- Softens the seed coat
- Activates internal growth mechanisms
- Signals the right time to grow (spring)
Without this cold period, the seeds remain dormant, no matter how ideal the conditions seem. It’s a biological requirement that we need to meet to encourage germination.
How to Stratify Norway Maple Seeds at Home (Simple Refrigerator Method)
So, you’ve got your Norway maple seeds, and now it’s time for the next step: getting them ready to sprout. For Norway maples, this means a process called cold stratification. Think of it as giving the seeds a little taste of winter, which is what they need to break out of their dormancy. It sounds a bit involved, but the refrigerator method is pretty straightforward.
Preparing the Seeds
First things first, give your seeds a good rinse. You can soak them in room temperature water for about 24 hours. This helps wake them up a bit. After soaking, you’ll want to get them ready for their chilly stay. The goal is to keep the seeds consistently moist but not waterlogged.
The Refrigerator Method
There are a couple of ways to do this, but here’s a simple one:
- Paper Towel Method: Grab some paper towels and dampen them – not soaking wet, just moist. Place your seeds on one half of the paper towel, then fold the other half over them. Carefully put the moist paper towel with the seeds inside a resealable plastic bag. Don’t seal it completely; leave a little gap for air exchange. You can also use a plastic container with a lid that isn’t airtight.
- Medium Method: Alternatively, you can mix your seeds with a bit of moist material like sand, peat moss, or even a bit of your seed-starting mix. The key is that the medium should be damp, like a wrung-out sponge. Put this mixture into a resealable plastic bag or container.
The Waiting Game
Once your seeds are prepped in their bags or containers, it’s time for the fridge. The crisper drawer, often called the vegetable drawer, is usually a good spot because the temperature is a bit more stable there. You’ll want to keep them in the refrigerator for about 90 to 120 days. That’s roughly three to four months. It’s a good idea to label the bag or container with the date you started the stratification process. You’ll need to check on them every week or so. Just peek inside to make sure the paper towel or medium is still moist. If it feels dry, add a tiny bit of water. You’re also looking for any signs of mold or rot, which you want to avoid. If you see any early germination, that’s great, but be gentle when you check.
This cold treatment mimics the natural winter conditions that Norway maple seeds need to break dormancy. Without it, they likely won’t sprout when you try to plant them.
After the stratification period is over, your seeds should be ready for sowing. You might notice they look a bit plumper or even have a tiny root emerging. This is a good sign that the stratification worked. Remember, Norway maple seeds can have low germination rates, so it’s wise to stratify more seeds than you think you’ll need. This process is a bit like preparing for a marathon; you want to give yourself the best possible start. If you’re looking for more details on seed collection, check outCollecting Maple Seeds.
Optional Scarification or Soaking Techniques Before Stratification
While Norway maple seeds (samaras) generally need cold stratification to wake them up, sometimes a little extra help before that cold period can make a difference. These optional steps, scarification and soaking, are all about breaking down the seed coat a bit to make it easier for water to get in, which can encourage germination. It’s not always necessary, especially if your stratification process is long enough, but it can be a good idea if you’re aiming for the best possible results.
Why Scarify or Soak?
Think of the seed coat like a protective shell. For some seeds, this shell is tough and might prevent water from entering, even during stratification. Scarification means physically nicking or scratching this coat. Soaking involves letting the seeds sit in water. Both methods aim to soften that outer layer. This can potentially speed up germination and improve the overall success rate, especially for seeds that might be a bit stubborn.
Scarification Methods
If you decide to scarify, you need to be gentle. You don’t want to damage the inside of the seed. Here are a couple of ways to do it:
- Sanding: You can rub the seeds gently against sandpaper. Use a medium-grit sandpaper and just roll the seeds around on it for a short time. The goal is to scuff the coat, not to grind it away.
- Nicking: Carefully use a small knife or even a nail file to make a tiny nick in the seed coat. Be very careful not to cut too deeply, as you could damage the embryo inside. Just a small break in the armor is all you need.
Soaking Techniques
Soaking is usually simpler than scarification. After collecting and cleaning your seeds, you can soak them in room temperature water. A good starting point is to soak them for about 12 to 24 hours. You can place them in a bowl of water. Just make sure the water stays at room temperature; don’t use hot water. After soaking, drain the seeds and proceed with your stratification process. Some people even mix a bit of fungicide into the soaking water to prevent any mold issues, though this is usually not a problem if you’re careful with moisture levels. If you’re unsure about the best approach for your seeds, you might want to check out resources on seed preparation.
It’s important to remember that these are optional steps. Norway maple seeds have a natural dormancy period, and the cold stratification is the most critical part of breaking that. If you’re short on time or want to keep things simple, you can often skip scarification and soaking altogether and still get good results. However, if you’re trying to maximize your germination rate, these little extra efforts might be worth it.
Seed Sowing Tips: Depth, Spacing, and Ideal Growing Medium
Once your Norway maple seeds have completed their cold stratification period, it’s time to get them into the soil. Choosing the right sowing medium and planting it at the correct depth are key steps for successful germination.
Ideal Growing Medium
A well-draining soil mix is important to prevent the seeds from becoming waterlogged, which can lead to rot. A good starting point is a mix of equal parts sphagnum peat moss and perlite. This combination provides aeration and retains enough moisture for germination without becoming overly saturated. You can also use a sterile seed-starting mix designed for containers. If you’re sowing directly outdoors, a spot with good drainage in your garden will suffice.
Sowing Depth and Spacing
When sowing seeds indoors in trays or pots, aim for a depth of about a quarter-inch to half an inch. Gently press the seeds into the moistened medium to ensure good seed-to-soil contact. If you’re sowing directly into the ground, the depth remains similar. Because Norway maple seeds have a notoriously low germination rate, it’s wise to sow more seeds than you think you’ll need. A density of 15 to 30 seeds per square foot is often recommended for outdoor sowing. This increases your chances of getting a good number of seedlings.
Watering and Initial Care
After sowing, water the medium gently to settle the soil around the seeds. Keep the soil consistently moist but not waterlogged. A spray bottle can be useful for initial watering to avoid disturbing the seeds. Maintaining consistent moisture is more important than the exact depth you plant them.
It’s a good idea to label your seed trays or sowing areas with the date you planted them. This helps in tracking germination progress and knowing when to expect seedlings to emerge.
Optimal Germination Conditions: Temperature, Moisture & Light
Once your Norway maple seeds have gone through the necessary stratification period and are ready for sowing, providing the right germination conditions is key to success. Think of it like giving the seeds the perfect environment to wake up and start growing.
Temperature
Norway maple seeds generally prefer a consistent, moderate temperature for germination. Aim for a range between 65-75°F (18-24°C). Temperatures outside this range can significantly slow down or even prevent germination. If you’re starting seeds indoors, a heated seed mat can be a great tool to maintain this ideal temperature, especially if your home tends to be cooler.
Moisture
Maintaining consistent moisture in the seed-starting mix is vital. The soil should feel like a wrung-out sponge – moist but not waterlogged. Overwatering can lead to seed rot, while letting the soil dry out completely will kill the delicate germinating seedling. It’s a balancing act, for sure. Checking the moisture level regularly and watering gently when the top layer of soil starts to feel dry is the best approach. You want to keep that soil consistently damp, but not soggy.
Light
When it comes to light, Norway maple seeds don’t need direct sunlight to germinate. Bright, direct sun can sometimes be too harsh for emerging seedlings. Once the seeds sprout and you see the first tiny leaves appear, they will benefit from bright, indirect light. Placing your seed trays near a sunny window that gets morning sun but is shaded during the hottest part of the afternoon is usually a good spot. If natural light is insufficient, a grow light can be used, keeping it a safe distance from the seedlings to avoid scorching.
Getting the temperature, moisture, and light just right creates a welcoming environment for your Norway maple seeds to sprout and begin their journey into young trees. It’s all about mimicking the conditions they’d naturally seek out to start growing.
Here’s a quick rundown of what to aim for:
- Temperature: 65-75°F (18-24°C)
- Moisture: Consistently moist, but not waterlogged soil
- Light: Bright, indirect light after germination
If you find your germination rates are lower than expected, don’t worry too much. It’s common for not every seed to sprout. The best strategy is simply to sow more seeds than you think you’ll need. This way, you’ll have plenty of healthy seedlings to choose from, and you can always thin out the weaker ones later. It’s a good idea to have extra, especially if you’re trying to grow a specific number of trees. You can find more information on starting trees from seed at Arbico Organics.
Managing Low Germination Rates: Sow Extra and Thin Later
It’s a common situation when growing trees from seed: not every single one decides to sprout. Norway maple seeds, in particular, can have quite variable germination rates, sometimes quite low. This is why it’s a good idea to plant more seeds than you think you’ll need. Planting extra seeds is your insurance policy against a sparse outcome.
Why Sow Extra Seeds?
- Variable Viability: Not all seeds collected will be viable, even after proper stratification. Some might be damaged, underdeveloped, or simply not capable of germinating.
- Environmental Factors: Even with ideal conditions, some seeds might not germinate due to subtle environmental fluctuations or unseen issues.
- Pest and Disease: Young seedlings can be vulnerable to pests or diseases, which can reduce your numbers.
How Many Extras?
Based on studies and general experience, Norway maple germination can range from very low to around 23 percent. To be safe, consider sowing at least three to five times the number of trees you ultimately want. For example, if you aim for ten healthy trees, plan to sow 30 to 50 seeds.
Thinning Your Seedlings
Once your seeds have germinated and the seedlings have developed their first set of true leaves, you’ll likely have a crowded tray or bed. This is the time to thin them out. Gently remove the weaker or overcrowded seedlings, leaving the strongest ones with enough space to grow. You can transplant these thinned seedlings to other locations if you wish, giving you even more trees.
When you’re sowing a large number of seeds, it’s easy to get a bit overwhelmed. Just remember that thinning is a normal part of the process. It helps ensure that the seedlings you keep have the best chance to thrive. Don’t be afraid to remove weaker ones to give the stronger ones room to grow. You can find more information on seed collection if you’re still gathering your materials.
Transplanting Thinned Seedlings
If you’ve thinned out seedlings, you can transplant them into individual pots or directly into a prepared nursery bed. Ensure the new location has well-draining soil and adequate moisture. Handle the young roots with care to minimize transplant shock. This process allows you to maximize the number of trees you can grow from your initial seed collection.
Caring for Maple Seedlings: Watering, Light & Transplanting
Once your Norway maple seeds have successfully germinated and developed a few sets of leaves, it’s time to focus on their care. This stage is pretty important for building strong, healthy young trees.
Watering
Keep the soil consistently moist, but not waterlogged. Think of it like a wrung-out sponge. Overwatering can lead to root rot, which is a quick way to lose your seedlings. Check the soil moisture by sticking your finger about an inch down. If it feels dry, it’s time to water. Using a gentle spray or a watering can with a fine rose will prevent disturbing the delicate seedlings. It’s better to water thoroughly less often than to give them a little sprinkle every day.
Light
Your young maple seedlings need bright, indirect light. A sunny windowsill that doesn’t get direct, harsh afternoon sun is usually perfect. If you’re starting them indoors, you might need to supplement with grow lights, especially if natural light is limited. Too much direct sun can scorch their tender leaves, while too little light will result in leggy, weak growth. Aim for about 12-16 hours of light per day.
Transplanting
When your seedlings have developed their second set of true leaves and a decent root system (you can gently tug on one to see if it resists), they might be ready for a bigger pot. Choose pots that are a bit larger than their current container, with good drainage holes. Use a well-draining potting mix. If you started them in a seed tray, carefully transplant each seedling into its pot. Handle them by the leaves, not the stems, to avoid damage. Early spring or fall are generally the best times to transplant seedlings into larger containers or their final outdoor location. If you’re moving them outside permanently, remember to harden them off first to prevent shock. This process gradually exposes them to outdoor conditions over a week or two. If you have extra seedlings, consider sharing them with friends or family who can provide a suitable spot for a Norway maple. Just make sure they understand the tree’s mature size requirements; these trees can get quite large, needing about a 30-foot radius of space when fully grown. This ensures they have plenty of room to develop properly without overcrowding. You might find that some seedlings don’t make it, so it’s always a good idea to start more than you think you’ll need. This is a common challenge when growing from seed, and it’s why we suggest sowing extra seeds initially. It’s also worth noting that if you encounter storage issues with your growing supplies, it might be due to insufficient storage space, similar to how a server might report an error.
Caring for seedlings requires patience and attention to detail. Providing the right balance of water, light, and eventually space will set them up for success as they grow into mature trees.
Hardening Off Seedlings: When and How to Acclimatize Outside
Once your Norway maple seedlings have developed a few sets of true leaves and a decent root system, it’s time to start getting them ready for the great outdoors. This process is called hardening off, and it’s pretty important for making sure they don’t get a shock when you move them from your protected indoor spot to their final home. Think of it like easing them into a new neighborhood – you wouldn’t just drop them off and leave, right? You’d introduce them slowly.
When to Start Hardening Off
Generally, you can begin hardening off your seedlings in the spring, once the danger of frost has passed in your area. A good sign that your seedlings are ready is if they have at least three to four sets of true leaves. You can also gently tug on a seedling; if it resists and feels like it has a solid root base, it’s probably ready for a little outdoor adventure.
How to Acclimatize Your Seedlings
Start by taking the seedlings outside for a short period, maybe 30 minutes to an hour, in a sheltered spot that’s out of direct sun and wind. Bring them back inside afterward. The next day, increase the time they spend outside by another 30 to 60 minutes. Keep doing this, gradually increasing their outdoor exposure each day. You’ll want to watch them closely for any signs of wilting or stress. If you see that, bring them back in sooner and try again the next day with less time.
Here’s a general schedule you can follow:
- Day 1: 30-60 minutes outside in a shaded, protected area.
- Day 2: 1-2 hours outside, still in a protected spot.
- Day 3: 2-4 hours outside, maybe introducing a little bit of morning sun.
- Day 4: 4-6 hours outside, increasing sun exposure.
- Day 5 onwards: Leave them out for longer periods, eventually overnight if temperatures are mild and no frost is expected. You can also start placing them in a cold frame during this time for added protection.
It’s really about observing your plants. Some might be tougher than others, and you’ll learn to read their signals. Don’t rush the process; a little patience now means stronger, healthier trees later.
By the end of a week or two, your seedlings should be able to stay outside all day and night without any issues. This gradual introduction helps them build up their resilience to outdoor conditions like sun, wind, and temperature fluctuations, making them much more likely to thrive once planted in their permanent location.
Selecting the Right Planting Site: Sun, Soil & Spacing Considerations
Once your Norway maple seedlings are ready for their permanent home, picking the right spot is pretty important. It’s not just about where it looks nice; the tree’s future health depends on it. You want to give it the best start possible, and that means thinking about sunlight, the ground it’ll grow in, and how much room it’ll need.
Sunlight Needs
Norway maples are pretty adaptable when it comes to light. They really do best in full sun, which means at least six hours of direct sunlight a day. However, they can also handle partial shade, especially when they’re young and the sun is really strong during the afternoon. So, while full sun is ideal for the most vibrant growth, a spot that gets morning sun and some afternoon shade won’t be the end of the world for your tree. Remember,maple trees thrive in various light conditions.
Soil Preferences
When it comes to soil, Norway maples aren’t super picky. They can grow in sandy soil, clay soil, or anything in between. What they appreciate, though, is soil that drains well. Soggy roots are no good for any plant, and maples are no exception. While they don’t need super-rich soil to survive, they’ll do better if the soil has some good nutrients and can hold a bit of moisture without becoming waterlogged. Aiming for a slightly acidic pH, somewhere around 5.5 to 6.5, is considered optimal for these trees.
Spacing Requirements
This is a big one. Norway maples grow into substantial trees, often reaching 40 to 50 feet in height and spreading just as wide, if not wider. You need to plan for that mature size right from the start. Make sure the spot you choose isn’t too close to buildings, power lines, or other large trees. A good rule of thumb is to give each tree at least a 30-foot radius of clear space around it. This allows for its full canopy to develop without crowding its neighbors or causing future problems.
Giving your Norway maple enough space from the get-go prevents issues down the line, like branches interfering with structures or roots causing problems with foundations. It’s all about planning for the tree’s mature size.
Ongoing Care for Young Norway Maple Trees: Watering, Mulch & Pruning
Once your young Norway maple trees are established, providing them with consistent care will help them grow strong and healthy. Think of it as giving them a good start in life.
Watering
While Norway maples are known for their drought tolerance once mature, young trees still need regular watering. Keep the soil consistently moist, but not waterlogged. A good rule of thumb is to water deeply when the top inch or two of soil feels dry. This is especially important during hot, dry spells. Overwatering can be just as detrimental as underwatering, so good drainage is key. You don’t want their roots sitting in soggy conditions, which can lead to problems like insufficient storage for the roots, metaphorically speaking.
Mulching
Applying a layer of mulch around the base of your young trees is a great idea. Use about 2-3 inches of organic mulch, like wood chips or shredded bark. Keep the mulch a few inches away from the trunk itself to prevent rot and discourage pests. Mulch helps retain soil moisture, suppresses weeds that compete for water and nutrients, and moderates soil temperature. It’s like a cozy blanket for the tree’s roots.
Pruning
Pruning young Norway maples is mostly about shaping the tree and encouraging a strong structure. The best time to prune is typically in late winter or early spring, before new growth begins. Focus on removing any dead, damaged, or crossing branches. If you’re aiming for a specific shape or want to encourage a strong central leader, you might need to do some selective thinning. Avoid heavy pruning, as this can stress the young tree. Remember, the goal is to guide its growth, not to drastically alter it.
Keeping your young Norway Maple trees healthy involves regular watering and proper care. Making sure they get the right amount of water and adding mulch around the base helps them thrive. Don’t forget about pruning to shape the tree and remove any dead branches. For expert advice and services to keep your trees looking their best, visit our website today!
Frequently Asked Questions
When is the best time to collect Norway Maple seeds?
Norway Maple seeds, also called samaras, are usually ready for collection in the fall, typically September or October. You can gather them when they turn a tan, dry color and start to detach from the tree, or wait until they naturally fall. It’s a good idea to collect more seeds than you think you’ll need because not all of them will sprout.
Why is cold stratification necessary for Norway Maple seeds?
Cold stratification is crucial because Norway Maple seeds need a period of cold, moist conditions to break dormancy and prepare for germination. This mimics the natural winter conditions that allow seeds to sprout in the spring.
How can I perform cold stratification for Norway Maple seeds at home?
You can easily stratify Norway Maple seeds at home by placing them in a plastic bag filled with moist material, like sand or peat moss. Then, store the bag in your refrigerator, typically between 33-39°F (0.5-4°C), for about 90 to 120 days.
Are there any special treatments before stratifying the seeds?
Before or during stratification, you can try scarifying the seeds by lightly scratching their outer coat with sandpaper or soaking them in warm water for a few hours. These methods can help water penetrate the seed coat, potentially improving germination rates, though they are optional.
What is the proper way to sow Norway Maple seeds?
When sowing seeds, plant them about a quarter-inch deep in a well-draining soil mix. Give them a little space, about 15 to 30 seeds per square foot, to allow room for growth. Keep the soil consistently moist.
What are the ideal conditions for Norway Maple seed germination?
Norway Maple seeds generally need consistent moisture, a temperature range of around 70-75°F (21-24°C), and indirect light to germinate. Avoid letting the soil dry out completely, but also ensure it doesn’t become waterlogged.
Why should I sow extra Norway Maple seeds?
Norway Maple seeds often have a low germination rate, meaning only a small percentage might sprout. To increase your chances of getting healthy seedlings, it’s recommended to plant many more seeds than you need. You can then thin out the weaker ones later.
How do I care for young Norway Maple seedlings after they sprout?
Once seedlings emerge, provide them with consistent watering and bright, indirect light. When they are strong enough, usually after the last frost, you can gradually get them used to outdoor conditions by exposing them to sunlight and air for increasing periods over a week or two before planting them in their final location.
Request a Quote
Our Services


